Pardot Grading Will Save You Hours of Work
Pardot Grading Will Save You Hours of Work

An Account Engagement (formerly known as Pardot) grade is a rating based on how well a prospect’s profile matches your ideal customer profile. Grades indicate how interested a company should be in their prospect as they are based on explicit information provided about themselves. The prospect rating is expressed as a letter grade that ranges from F (worst) to A+ (best). Pardot assigns an initial grade of D to all prospects, which only shows up on the prospect record until it has matched or unmatched at least one criterion. Grades are a useful tool to align sales and marketing on lead quality.
Concept:
For a prospect, an Account Engagement (Pardot) grade starts from letter D. The grades can be increased or decreased by 1/3, 2/3, or 3/3 of a letter grade. The weights help determine how strong an indicator each criteria is in determining lead quality. Note, it takes ten ⅓ adjustments to move a prospect from D to A+. 1 entire letter grade can be considered 3/3. This way you can add the top part of the fraction to better understand the impact of criteria matching when you’re testing prospect impacts.
Default Grading in Account Engagement:
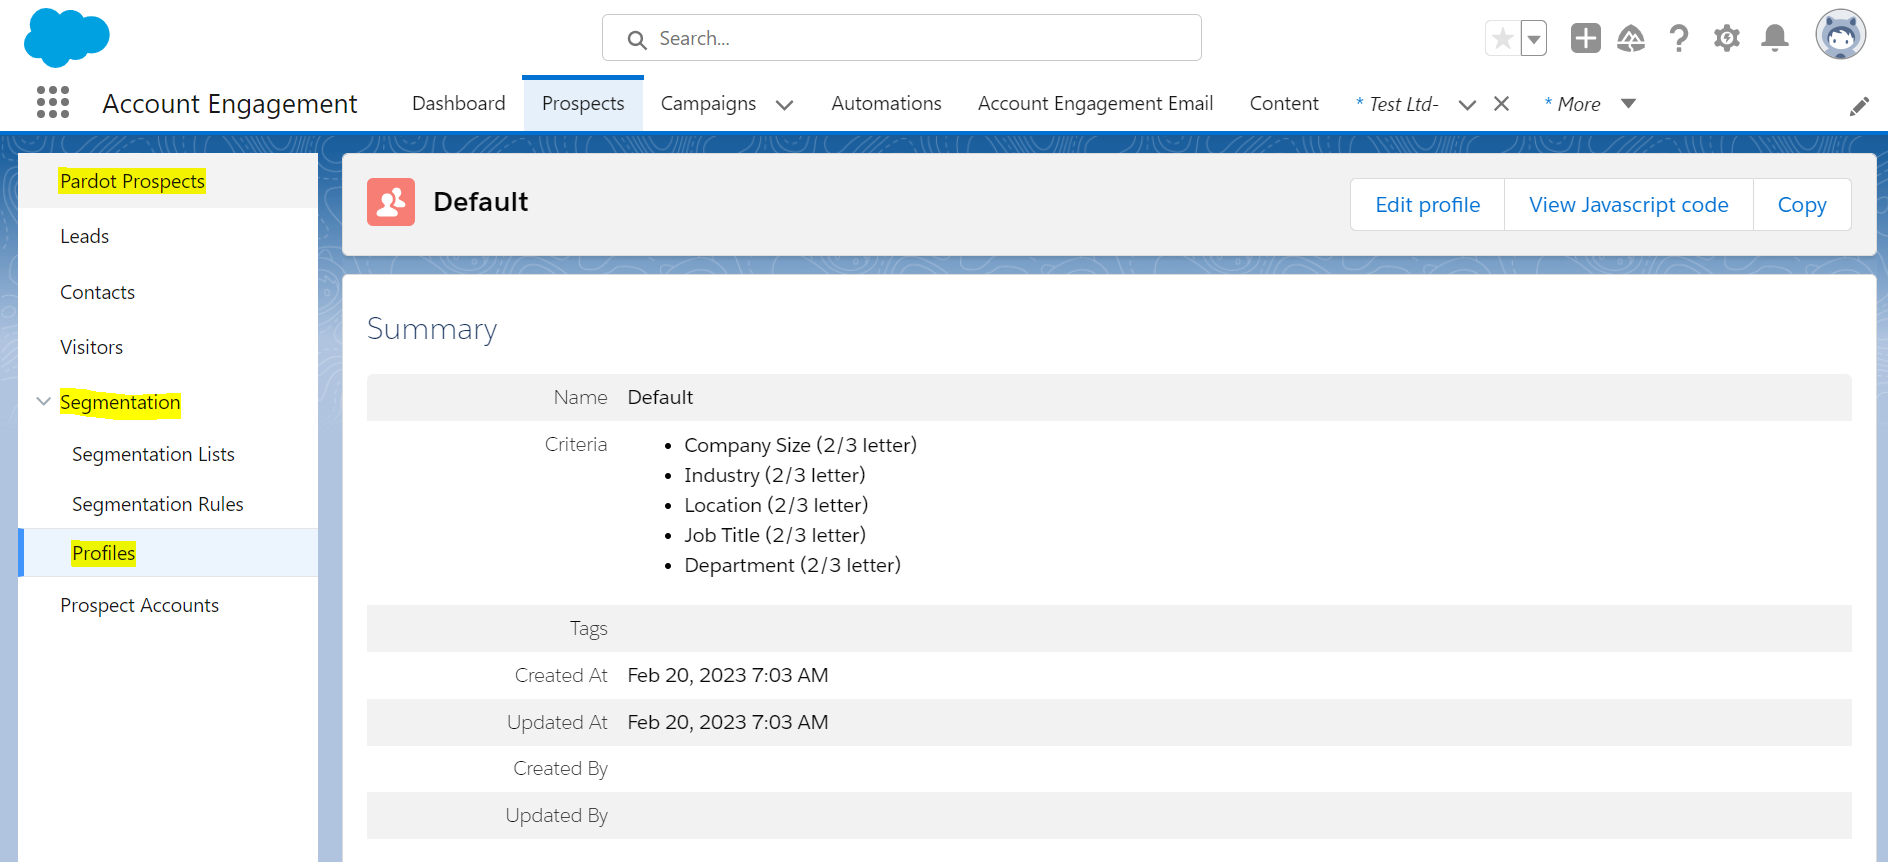
All Pardot accounts come with a default profile set to measure prospects against five criteria.
- Company size — (2/3 letter grade)
- Industry — (2/3 letter grade)
- Location — (2/3 letter grade)
- Job title — (2/3 letter grade)
- Department — (2/3 letter grade)
All prospects are assigned the default profile upon creation. Since the default profile is already applied to every prospect, it’s often a good idea to simply edit the default profile to match your ideal prospect profile. The best practice is to create individual automation rules to determine if the profile matches or does not match for positive and negative grading.
Path/ Navigation
- Navigate to Pardot Prospects > Segmentation > Profiles > Default.
Creating your Grading Criteria:
The next step in setting up grading is deciding which characteristics make up your ideal buyer. The insights on qualification criteria provided by the Sales team are used to qualify a prospect. The details provided by a prospect on a form, or through data tools play a key part in determining the grading criteria. Some of them are:
- Annual revenue
- Industry
- Job level, Job Title
- Company Size (Employees)
Creating a Grading Criteria Matrix:
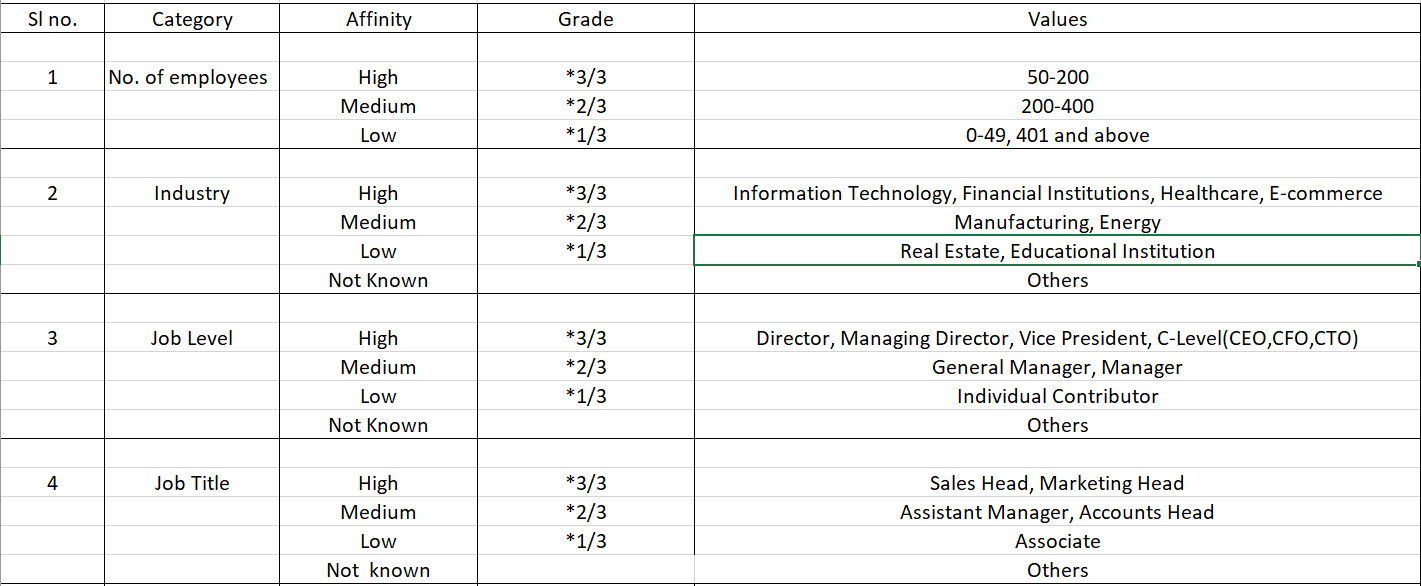
Prepare a table by placing the values depending on the criteria set by the Sales team. Check the weightings for each value which make sense and will produce sensible results when put into action. The above spreadsheet is an example like, If a prospect matches ‘Industry’ with ‘Information Technology’ or ‘Healthcare’, the grade will be increased by 1 full letter.
A new profile ‘Demo’ is created, wherein the above criteria are put to organize the grading.
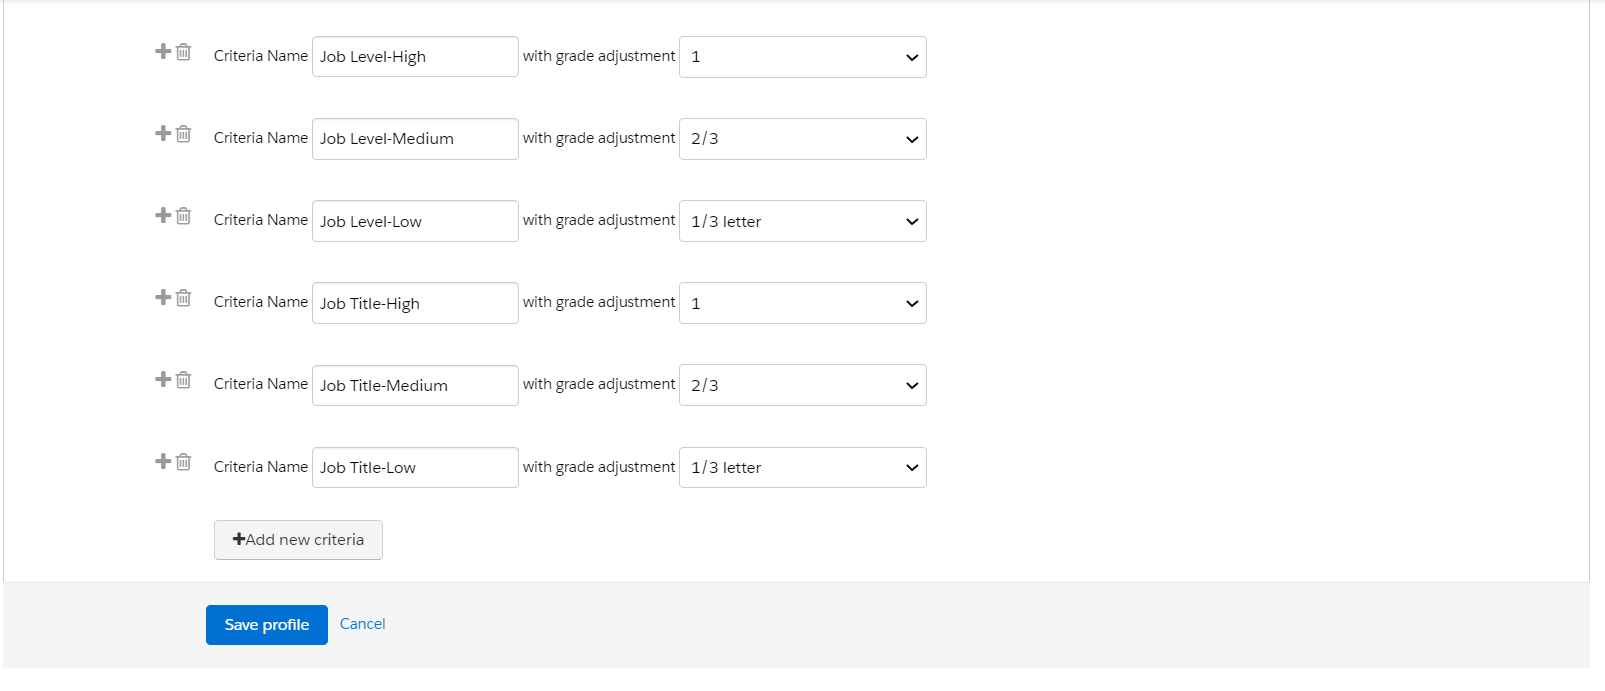
Find the criteria section with two boxes, ‘Criteria Name’ and ‘with grade adjustment’.
- Enter the criteria name like ‘Industry- High’ with grade adjustment ‘1’.
- Repeat this by clicking + Add New Criteria for all the other criteria.
- Click on the ‘Save’ tab.

Assigning Prospects to the profile:
All Account Engagement prospect comes with a Default grading profile. One must segment and reassign the prospects who now belong to the newly created profile. This can be done in two ways.
- Creating Automation Rules based on the criteria (recommended).
- By editing the prospect information manually.
Automating the Account Engagement Grading:
To automate the Account Engagement grading system, multiple Automation Rules are run.
- Instruct Account Engagement to assign the prospects to the profile created.
- Include prospects whose field value fits the criteria.
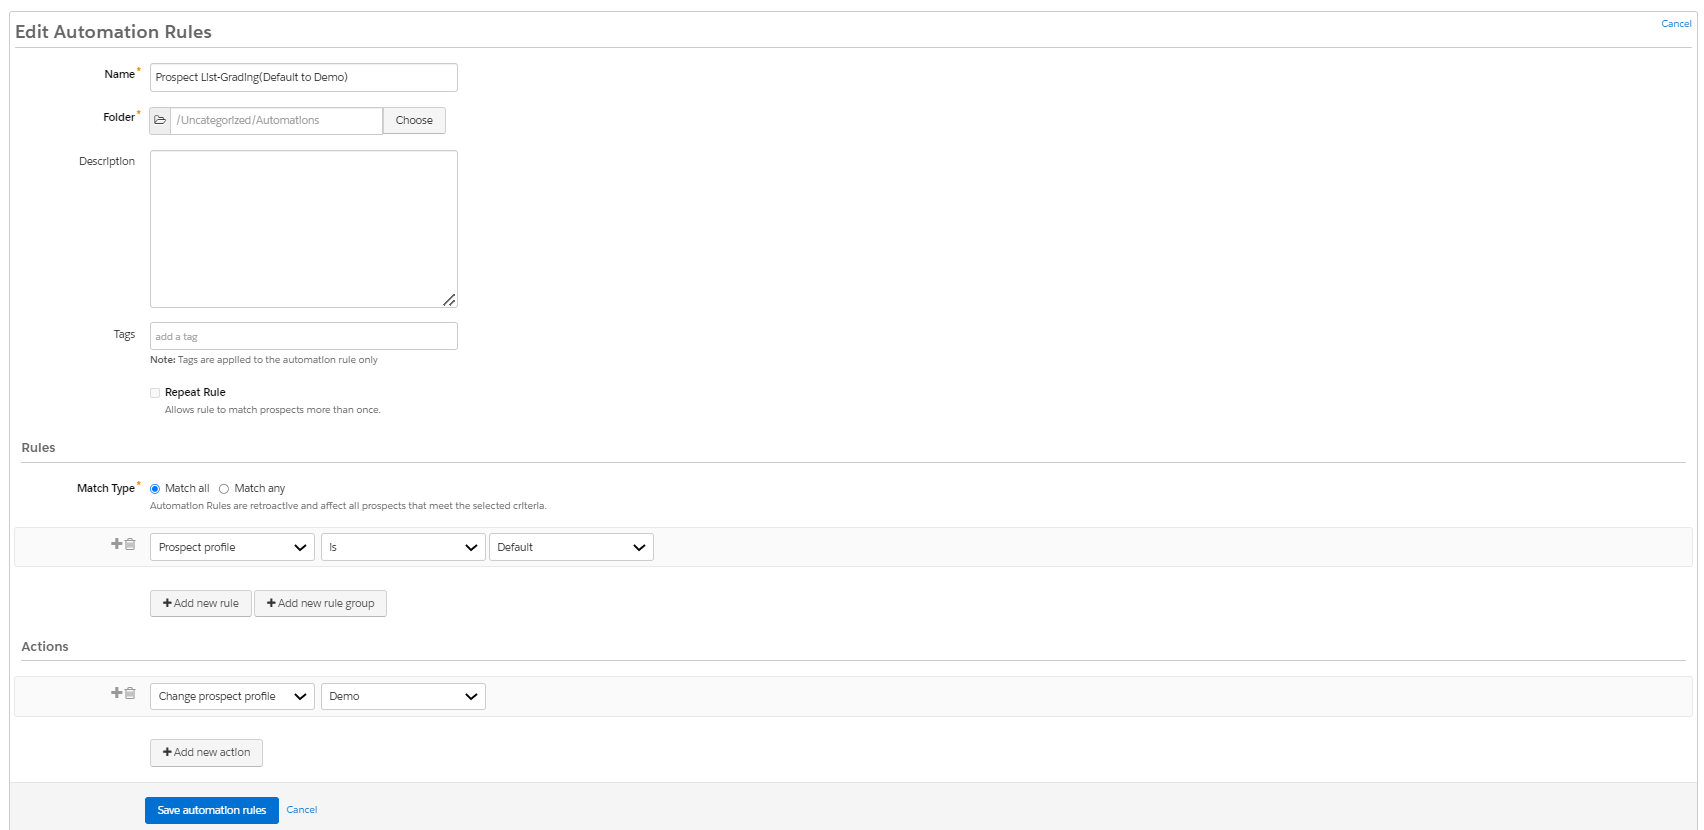
3. Create an automation rule for each criterion set for the profile.
For example, the automation rule for the field ‘Employee or Company Size’- High is between (50 and 200)
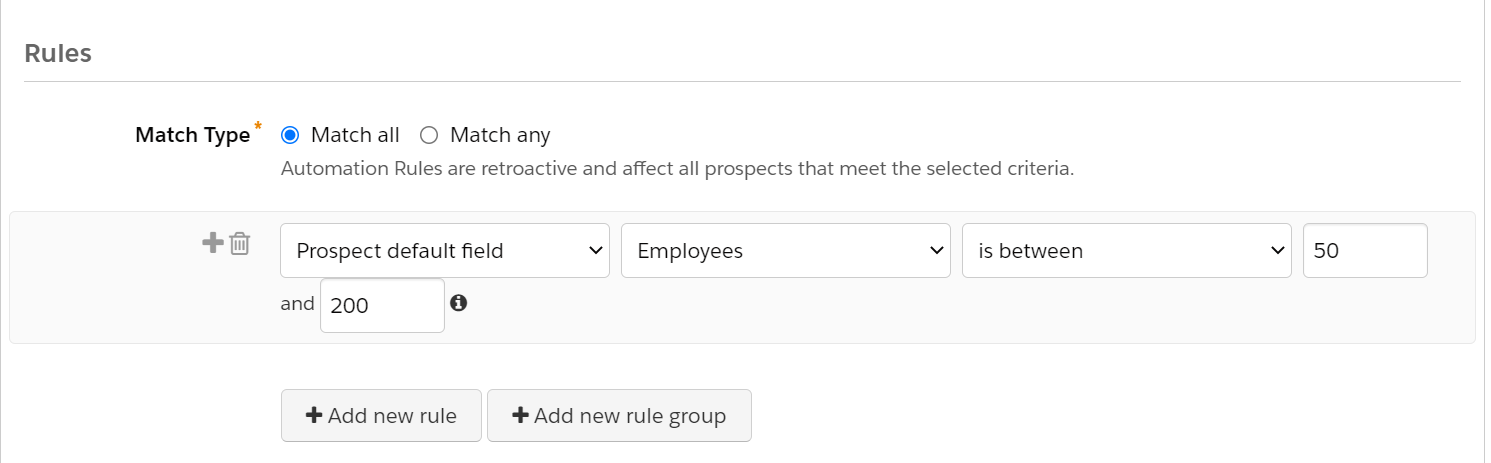
then Action that follows,
Change ‘Demo’ (name of the profile), Employee or Company size (name of criteria), — Matches.
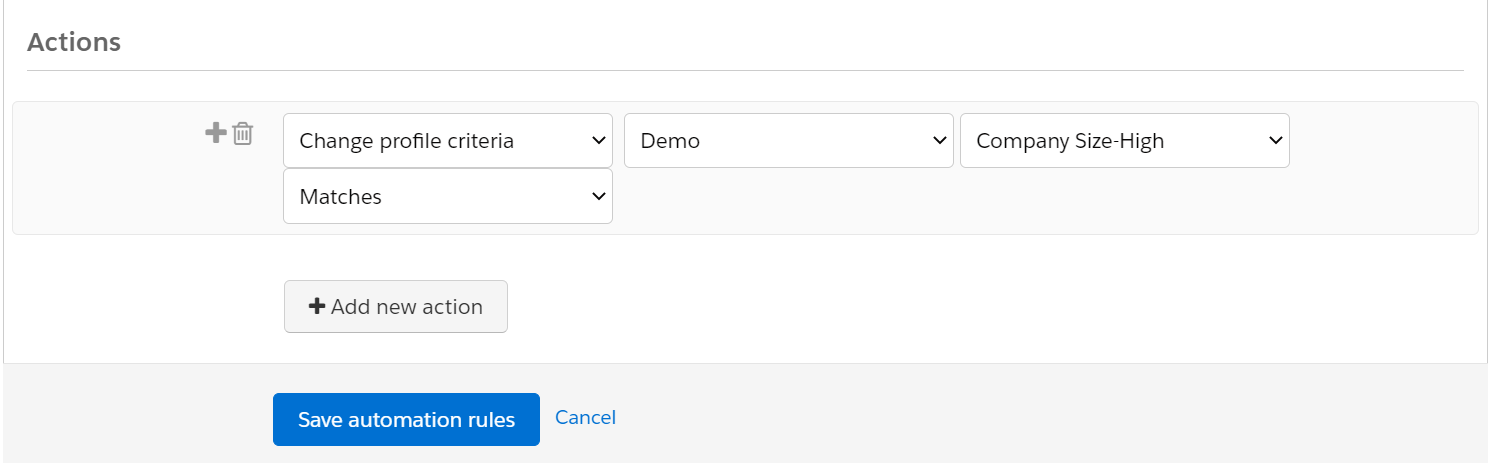
Save the automation rule.
Repeat the same process for all the other criteria.
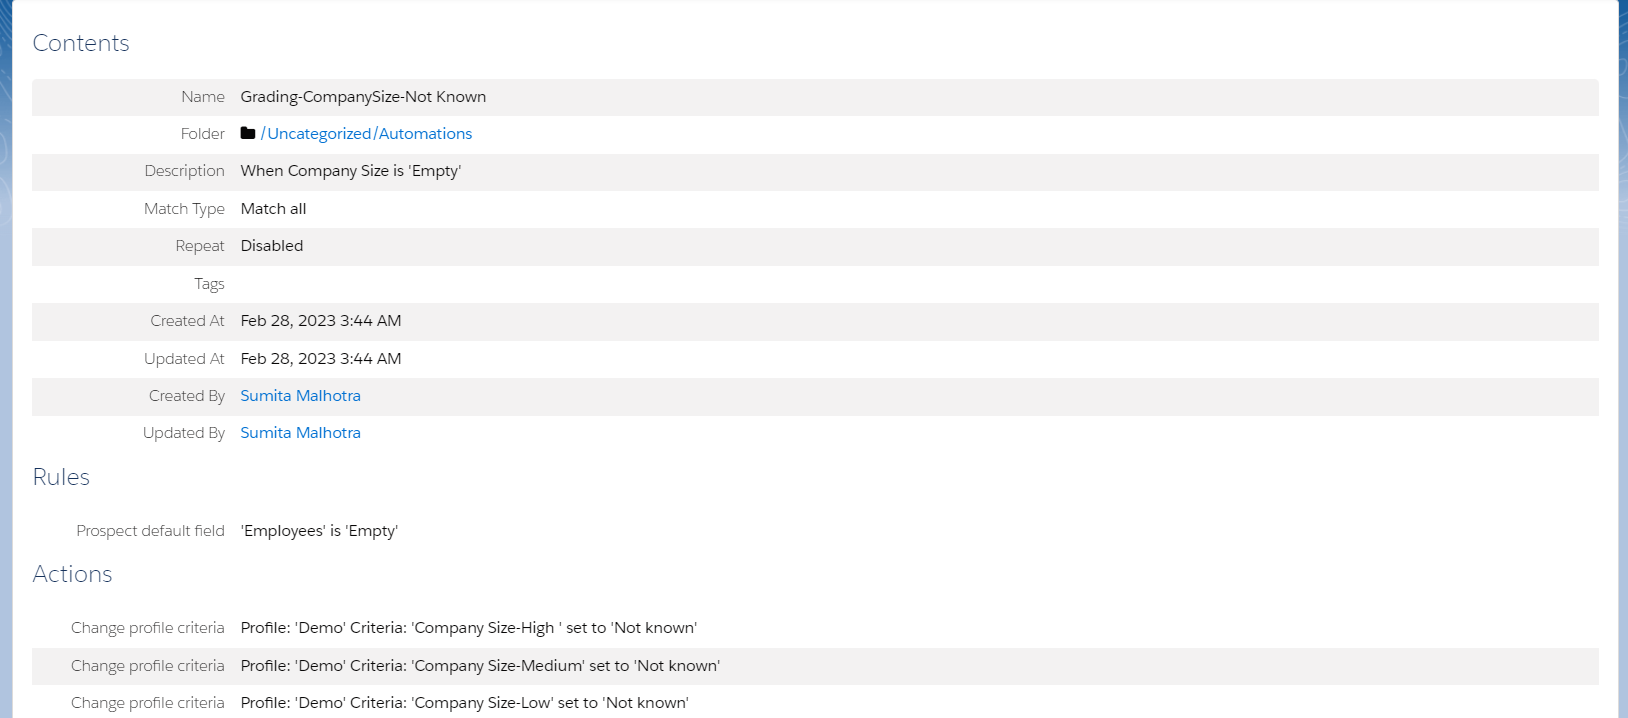
Creating Automation Rule to set ‘Not Known’ criteria:
It is extremely important to reset the grade if a prospect’s field value changes. For example, if a prospect with ‘Employees or Company Size’ value between ’50 and 200’ which is considered a strong match in your company criteria changes to ‘201 and 400’ which is considered a medium match, the grading will be incorrect as there is no instruction made to the system not to match the criteria in case of any change. It means we need to instruct the system to mark the other criteria as ‘not known’.
Add ‘Action’ to the same automation rule created for each criteria.
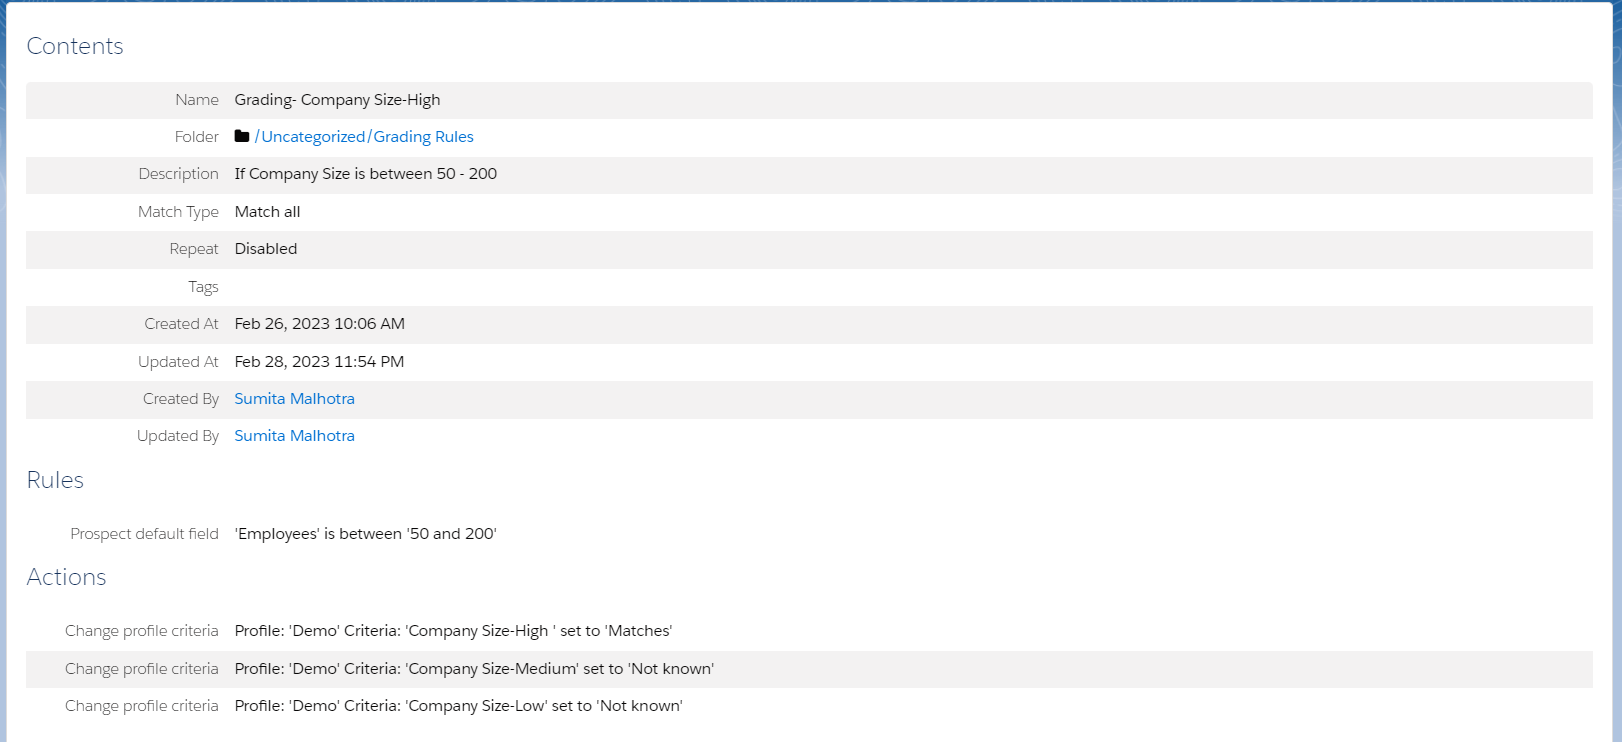
In this automation rule, the rule is set when the prospect matches the ‘Employee or Company size’ ‘High’ affinity), the system takes the action and it matches with the ‘High’ profile criterion, but for the other two criteria it will not take any action as it is set to ‘Not Known’. Similarly, we need to add this condition to all the criteria set for grading. Also, instruct the system to add one more automation rule if the field value is not specified and is kept empty.
Summary
Pardot Grading with automation rules helps to trail the best prospect for the company. Once they are resumed and start to match the prospects, the phenomenon lightens the marketing team’s work. It helps the company to prioritize the prospects who can likely be converted into opportunities.
Got any questions on Pardot Grading?
Please reach out to sumita.malhotra@proso.ai for a free assessment of your Salesforce- Account Engagement application.
Follow Proso.ai on Instagram, Twitter, Medium & LinkedIn, for more insights & news, and blogs.